Verify via UI
You can verify using our new verification UI at verify.sourcify.dev. See the Github repo here.
First choose the chain you want to verify the contract on and provide the contract address.
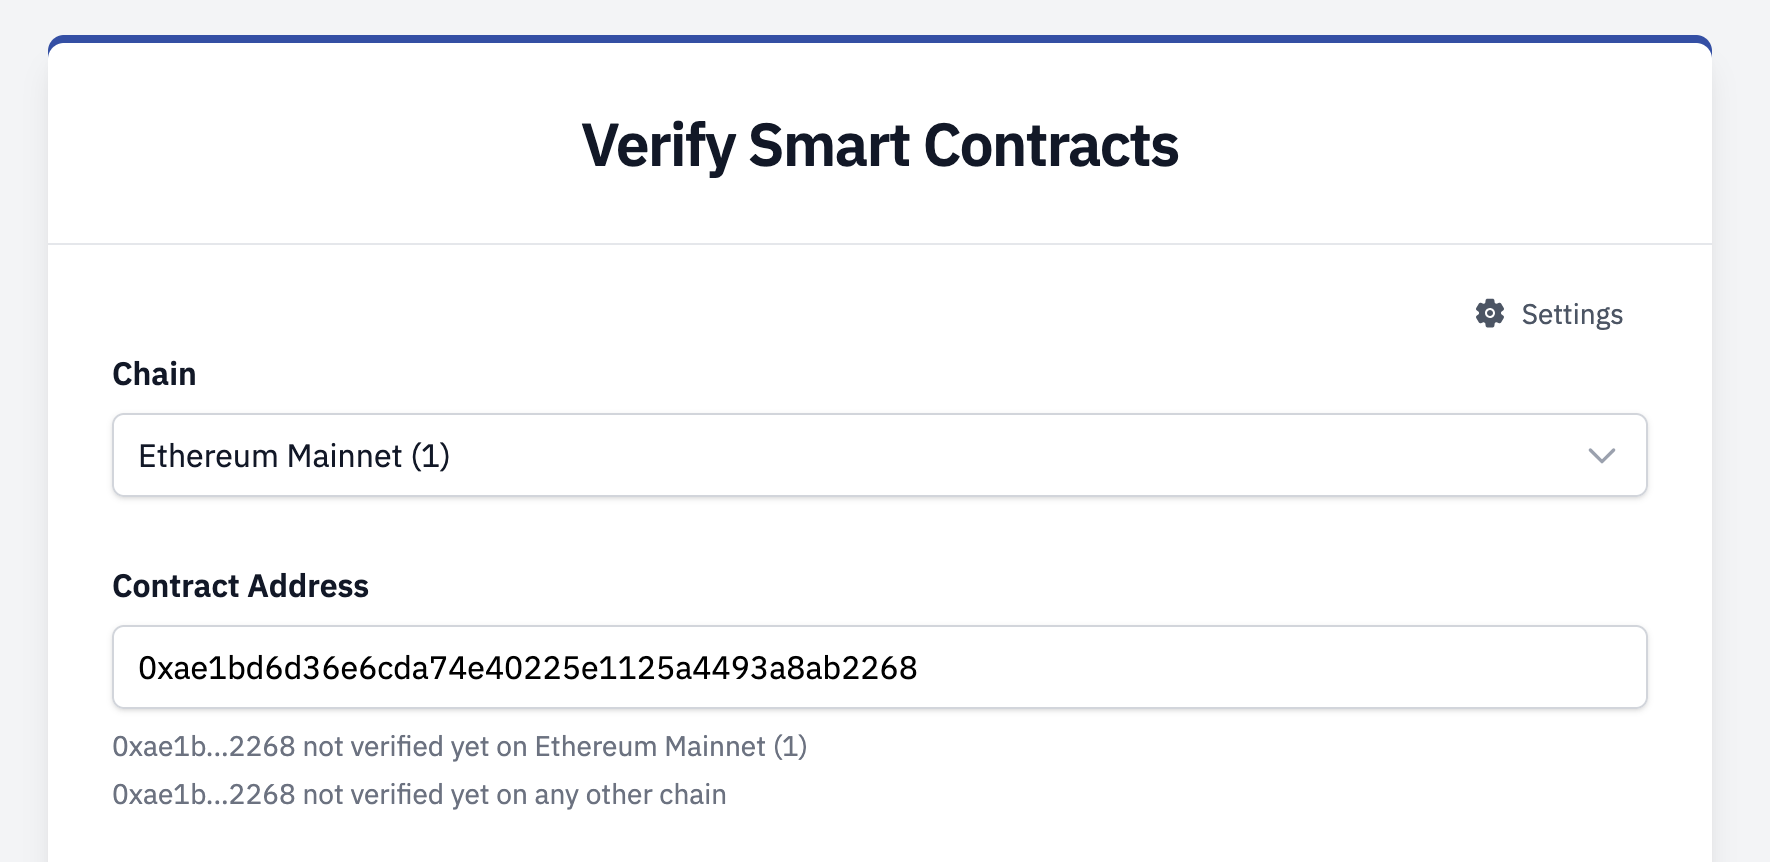
This will automatically check if the contract is verified on Sourcify on the same chain and all other supported chains.
Importing a contract
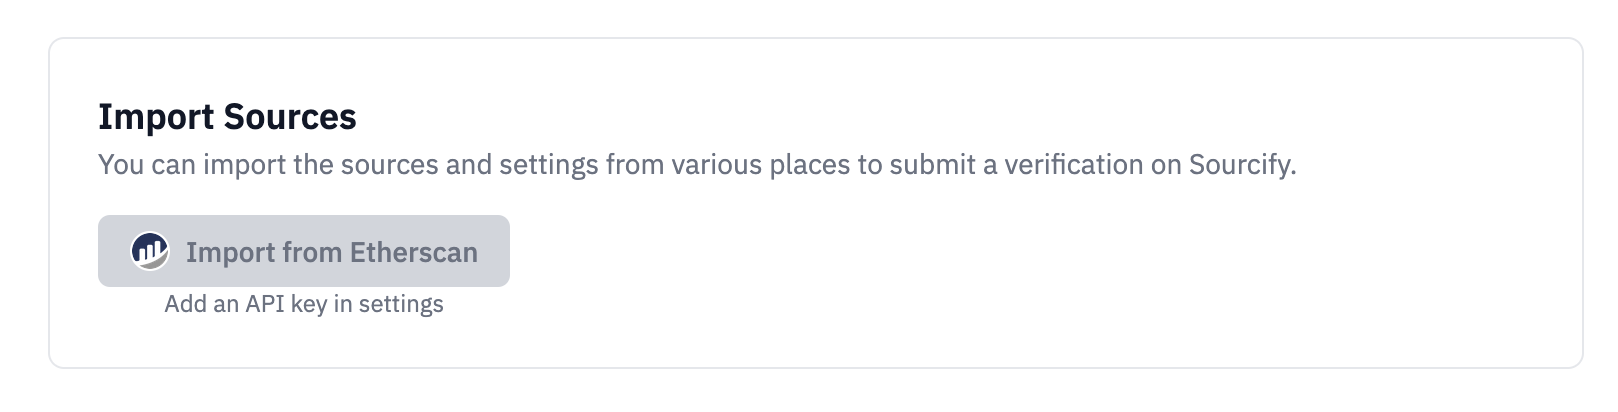
You can import a verified contract from different sources:
- Etherscan: Enter the chain and contract address to import the contract. You need an Etherscan API key to use this feature. Open the "Settings" on top right to add your API key. API keys are used locally in the browser and are not sent to Sourcify servers.
Verification Methods
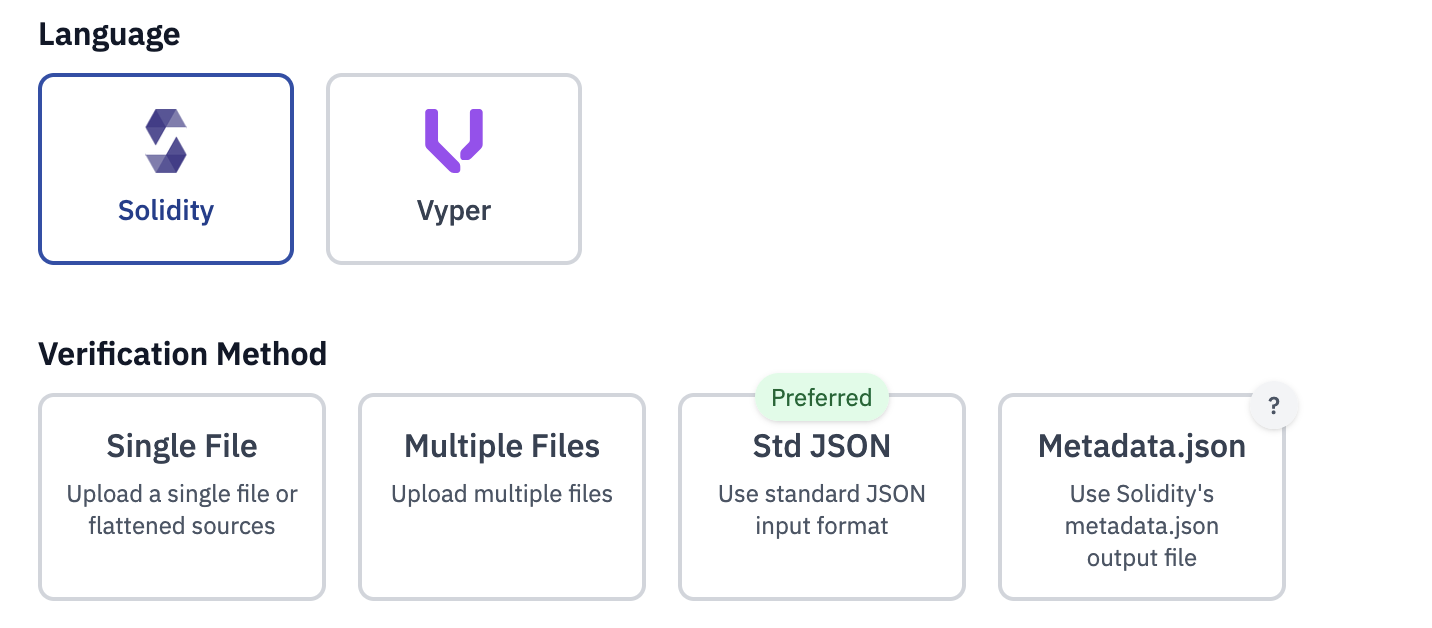
For both Solidity and Vyper contracts you can choose between the following verification methods:
- Single file: Provide single .sol or .vy file, alongside compiler settings.
- Multiple files: Provide multiple .sol or .vy files, alongside compiler settings.
- (preferred) Standard JSON: Provide a standard JSON input file.
Prefer using the standard JSON or framework commands directly (see below) to maintain the full compilation and avoid any changes. Different compiler settings can break the verification. Flattening the sources also breaks the metadata hashes and you won't be able to get an "Exact Match".
Additionally the following option is available for Solidity contracts:
- Metadata.json: Provide a metadata.json file to verify the contract in the first file input field. Provide all the source files in the second file input field. This option checks the source hashes in the metadata.json provided and compares them with the hashes of the source files provided before submitting the verification.
Available verification methods
Contract Identifier
From the files and contracts provided, we will ask you to select the contract you want to verify. Ie. if you've written a contract called MyContract.sol using other contracts Ownable.sol and ERC20.sol, you will be asked to select MyContract.sol as the contract to verify.
The format of the contract identifier is path:contractName e.g.
path/to/contractName.sol:contractName
The verification UI will parse the files and give you a list of contracts to choose from. You can always input the contract identifier manually.
(Optional) Creation Transaction Hash
Sourcify needs to find the transaction the contract was deployed in to get the creation bytecode. We get this information from different sources like block explorers (see here). You can still provide a creation transaction hash manually if you want to, or if Sourcify fails to verify via creation bytecode.
Hardhat/Foundry build-info files
If you’re using Hardhat or Foundry, the best way to verify is to use the framework’s CLI directly (see the respective documentation page to learn how). However, it is also possible to use the Sourcify build-info files to verify.
The build-info files are generated by the frameworks and contain the compilation information. This can be parsed and used by the verify.sourcify.dev UI to verify the contract.
You can find the build-info files in:
- Hardhat:
artifacts/build-info/<build-hash>.json - Foundry:
out/build-info/<build-hash>.json

Build info files toggle
Click on the toggle to "Upload build-info file" and select the build-info file.
Verification Job
Once you've provided all the information, you can submit the verification. This will create a verification job. You can see the job in the UI and get the verification result.
If the verification fails you can see the error message and why it failed.
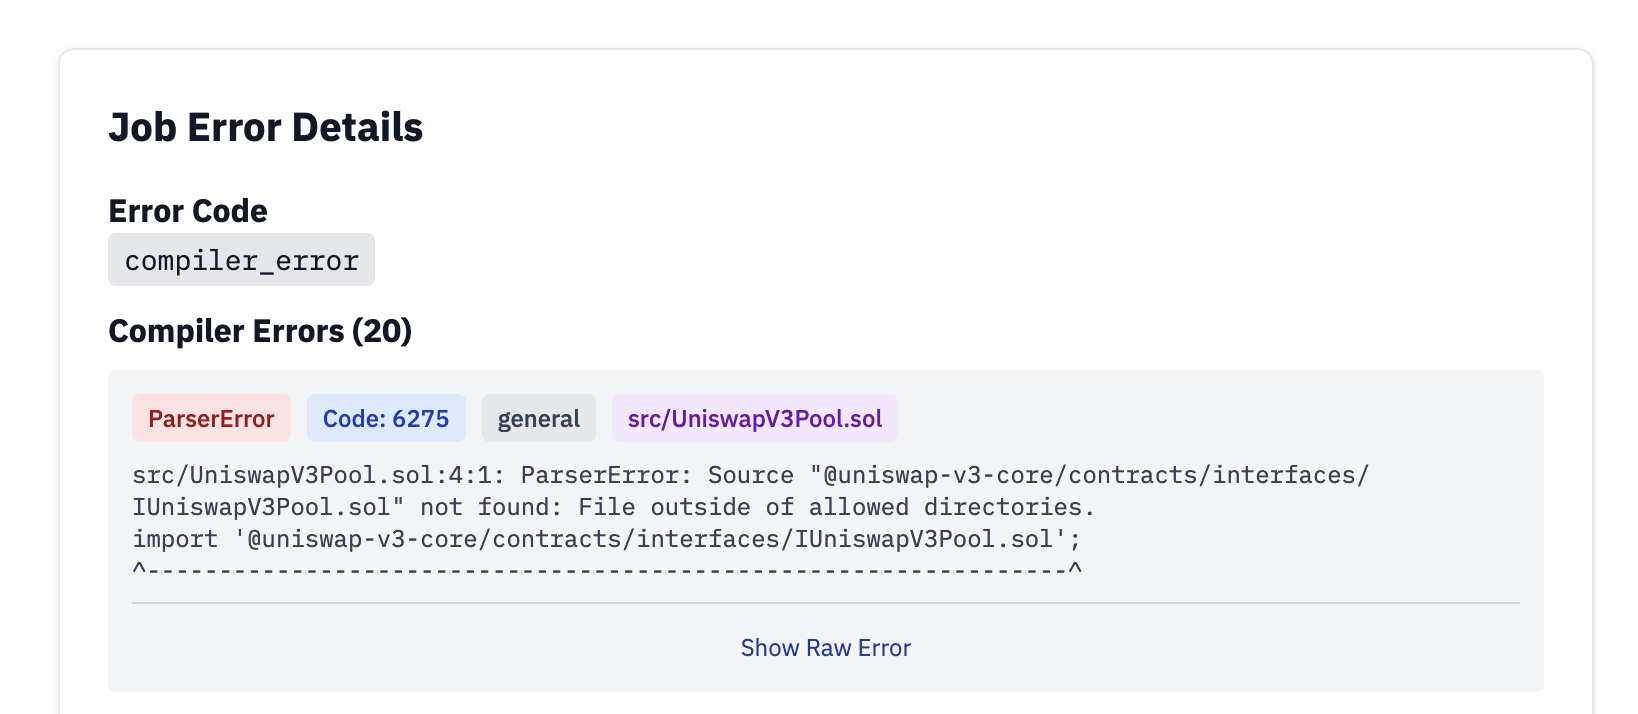
Example of a verification job that failed
You can see the diffs of the bytecodes if the compilation succeeds but the bytecodes did not match.
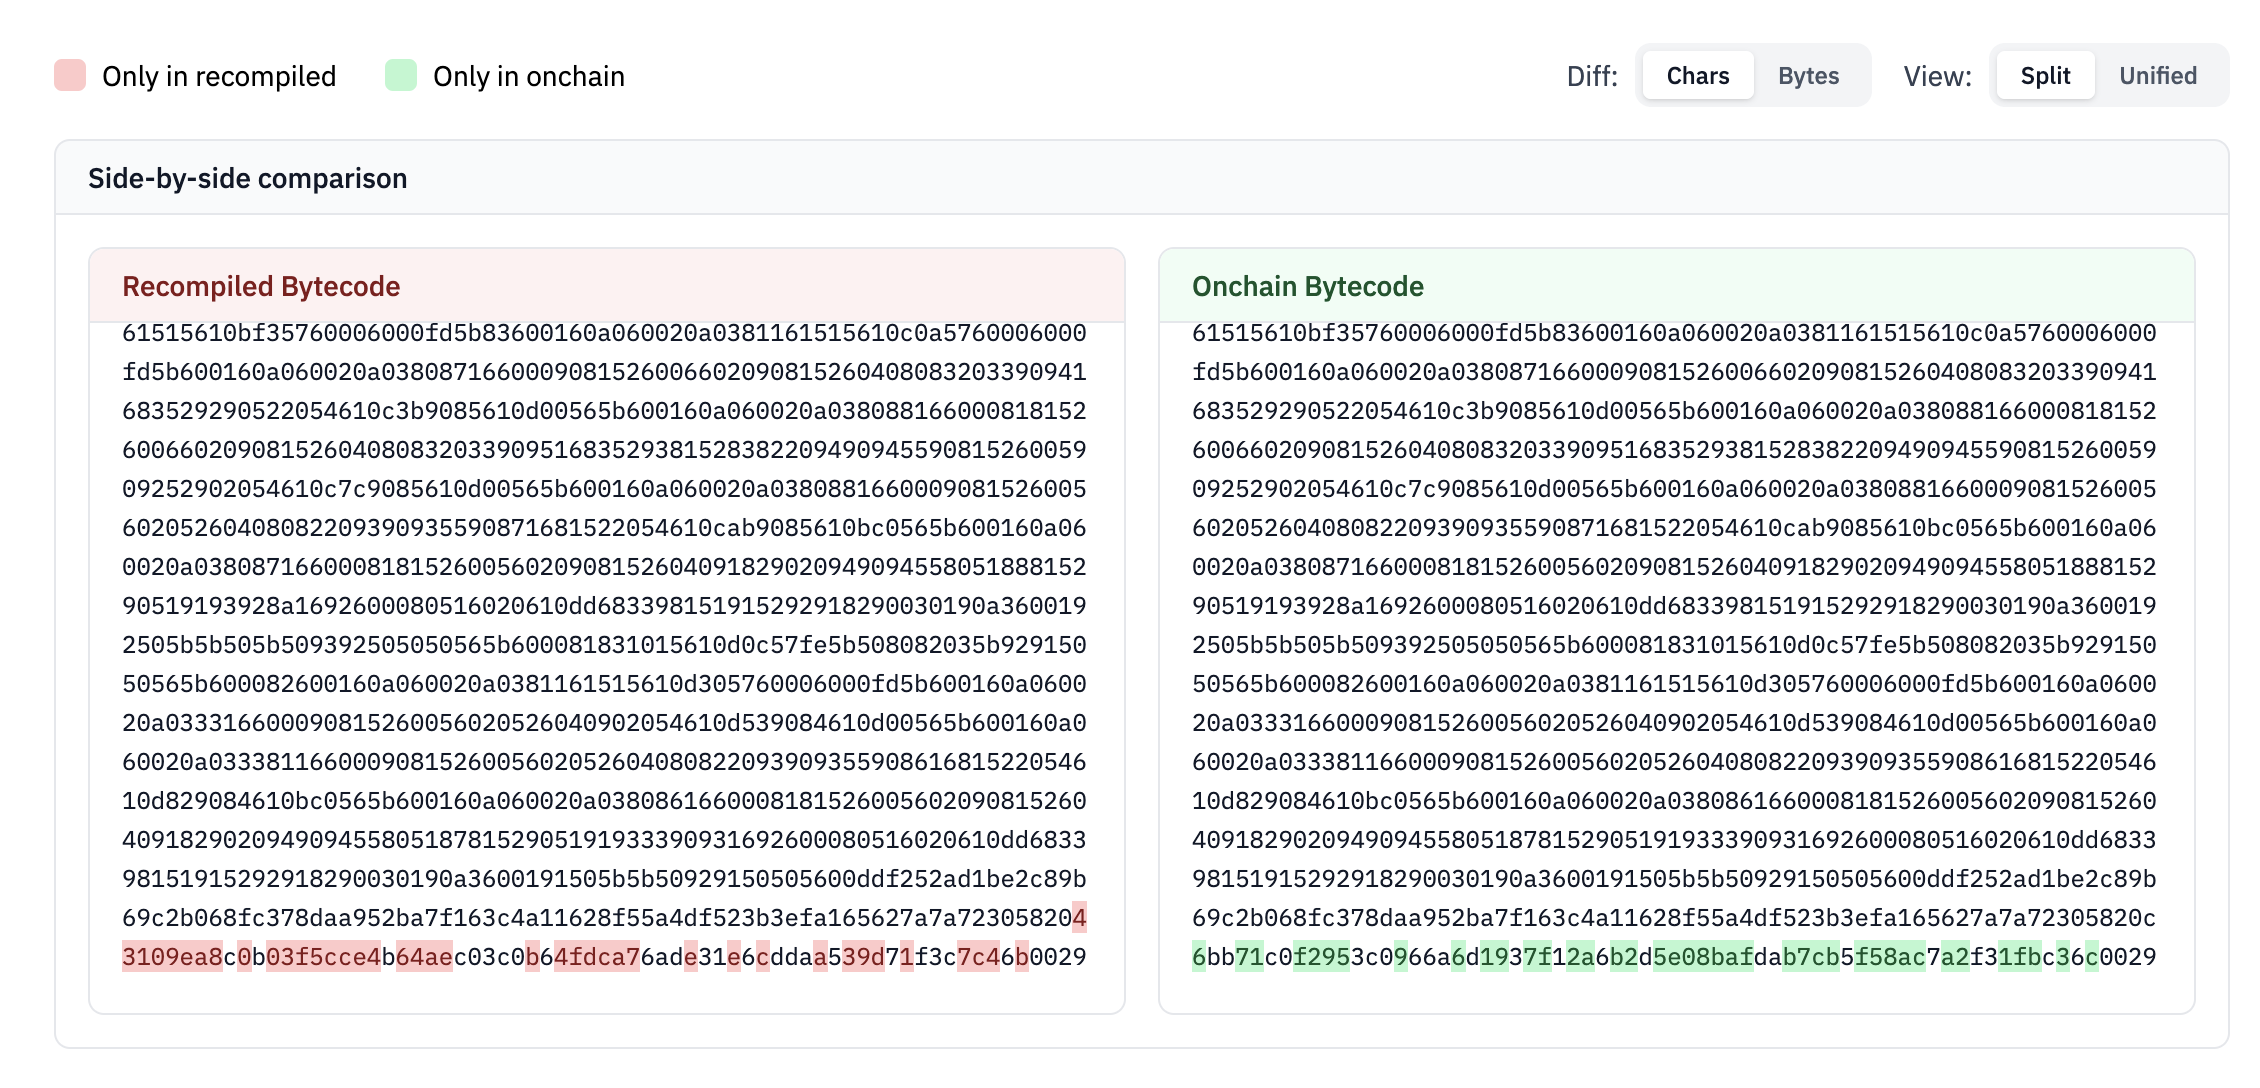
Bytecode diffs